Sharing notes from my ongoing learning journey — what I build, break and understand along the way.
Hyper-V Kubernetes Lab on Ubuntu 24.04: 2-Node Cluster with kubeadm, containerd & Flannel
Build a 2-Node Kubernetes Cluster on Hyper-V with Ubuntu 24.04 (kubeadm + containerd + Flannel)
In this article, I explain how to set up a Kubernetes cluster on Hyper-V using two virtual machines (1 Control Plane + 1 Worker). In this setup, I use Ubuntu Server 24.04 LTS, the containerd runtime, kubeadm/kubelet/kubectl components, and Flannel as the pod network (CNI). In the last section, I deploy an Nginx application on the cluster, scale it, and expose it to the outside world using NodePort.
1) Architecture and Goal
The setup I will build:
- k8s-cp1: Control Plane (API Server, Scheduler, Controller Manager, etcd)
- k8s-w1: Worker (the node where Pods run)
Pod network used:
- Pod CIDR (Flannel): 10.244.0.0/16
This architecture is a small model of large production clusters. The critical goal here is that the two nodes can access each other on the same network and have internet access.
2) Hyper-V Preparation
2.1 Virtual Switch
I connected both VMs to the same switch. This way, the nodes can get IP addresses on the same network and can see each other.

2.2 Creating the Virtual Machines
I created two VMs:
- k8s-cp1 (control plane)
- k8s-w1 (worker)
Recommended resources:
- 2 vCPU
- 8 GB RAM (minimum 4 GB)
- 60 GB disk
- Ubuntu Server ISO: 24.04.x
I downloaded the Ubuntu Server ISO from Canonical’s official site and attached it to the VMs via the DVD drive.
Note: In some lab environments, Ubuntu ISO may not boot when Secure Boot is enabled. In such a case, Secure Boot can be disabled from VM Settings → Security.

3) Ubuntu Server Installation (k8s-cp1 and k8s-w1)
I performed the installation the same way on both VMs. Only the hostname is different:
- Control Plane hostname: k8s-cp1
- Worker hostname: k8s-w1
Important points during installation:
- OpenSSH server: enabled
- Disk: entire disk can be used
- User: e.g., admin1 (I used admin1)
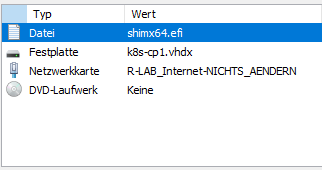
After the installation finishes, to prevent the ISO from remaining attached during reboot, I set the DVD Drive to “None/Keine”. Otherwise, the VM may boot into the installer again.
4) Post-Install Check
On each node, I checked the IP:
ip a
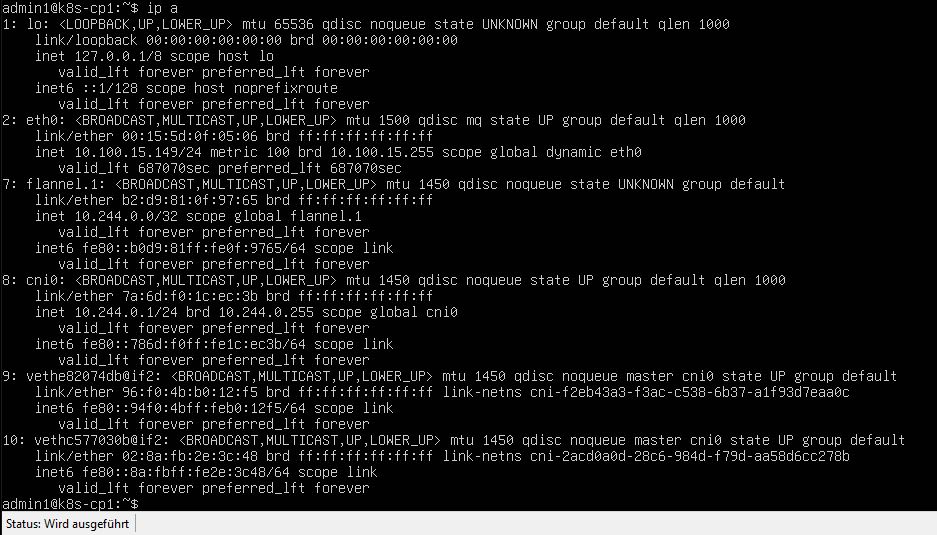
In the rest of this article, my cluster received these IPs:
- k8s-cp1: 10.100.15.149
- k8s-w1: 10.100.15.148
5) Kubernetes Pre-Requirements (On Both Nodes)
Before installing Kubernetes, certain system settings are mandatory on both nodes. The steps in this section are applied on both k8s-cp1 and k8s-w1.
5.1 Disabling Swap
Kubernetes refuses to run by default when swap is enabled.
sudo swapoff -a
sudo sed -i '/ swap / s/^/#/' /etc/fstab
free -h

5.2 Kernel Modules and sysctl
For the pod network to work properly, the br_netfilter and overlay modules and some sysctl settings are required.
cat <<EOF | sudo tee /etc/modules-load.d/k8s.conf
overlay
br_netfilter
EOF

sudo modprobe overlay
sudo modprobe br_netfilter
sysctl settings:
cat <<EOF | sudo tee /etc/sysctl.d/k8s.conf
net.bridge.bridge-nf-call-iptables  = 1
net.bridge.bridge-nf-call-ip6tables = 1
net.ipv4.ip_forward                 = 1
EOF

sudo sysctl --system
Check:
sysctl net.bridge.bridge-nf-call-iptables
sysctl net.ipv4.ip_forward

6) Installing containerd (On Both Nodes)
Kubernetes needs a container runtime. Here, I use containerd.
6.1 Installation
sudo apt update
sudo apt install -y containerd
6.2 Default config and SystemdCgroup
I generated the containerd config and enabled SystemdCgroup. This is critical for cgroup management compatibility with kubelet.
sudo mkdir -p /etc/containerd
sudo containerd config default | sudo tee /etc/containerd/config.toml
sudo sed -i 's/SystemdCgroup = false/SystemdCgroup = true/' /etc/containerd/config.toml
I restarted and enabled the service:
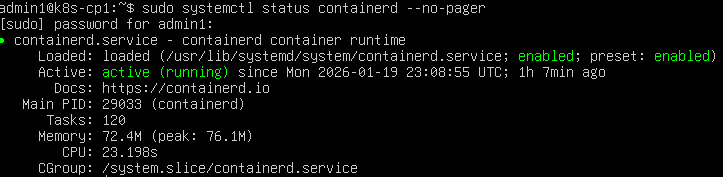
sudo systemctl restart containerd
sudo systemctl enable containerd
sudo systemctl status containerd --no-pager
7) Kubernetes Packages (On Both Nodes)
I install kubeadm, kubelet, and kubectl. Version compatibility is important; I proceeded with the v1.29 series.
7.1 Required packages
sudo apt-get update
sudo apt-get install -y apt-transport-https ca-certificates curl gpg
7.2 Add repo key and repo (v1.29)
sudo mkdir -p /etc/apt/keyrings
curl -fsSL https://pkgs.k8s.io/core:/stable:/v1.29/deb/Release.key | sudo gpg --dearmor -o /etc/apt/keyrings/kubernetes-apt-keyring.gpg

echo "deb [signed-by=/etc/apt/keyrings/kubernetes-apt-keyring.gpg] https://pkgs.k8s.io/core:/stable:/v1.29/deb/ /" | sudo tee /etc/apt/sources.list.d/kubernetes.list
Installation:
sudo apt-get update
sudo apt-get install -y kubelet kubeadm kubectl
sudo apt-mark hold kubelet kubeadm kubectl
Version check:
kubeadm version
kubectl version --client

8) Control Plane Setup (Only on k8s-cp1)
Now I can initialize the cluster. This step is only performed on the control plane node.
8.1 kubeadm init
I ran this on the control plane node:
sudo kubeadm init --pod-network-cidr=10.244.0.0/16
When successful, the output shows:
- Your Kubernetes control-plane has initialized successfully!
- 3 commands for kubeconfig
- worker join command
8.2 kubectl configuration (kubeconfig)
I ran the commands exactly as shown in the kubeadm output:
mkdir -p $HOME/.kube
sudo cp -i /etc/kubernetes/admin.conf $HOME/.kube/config
sudo chown $(id -u):$(id -g) $HOME/.kube/config
I checked node status:
kubectl get nodes
At this point, the control plane usually appears as NotReady because CNI has not been installed yet.

9) Pod Network (CNI) — Flannel (k8s-cp1)
In Kubernetes, a CNI is required for Pods to reach each other. Flannel is a fast and clear choice for learning purposes.
kubectl apply -f https://raw.githubusercontent.com/flannel-io/flannel/master/Documentation/kube-flannel.yml
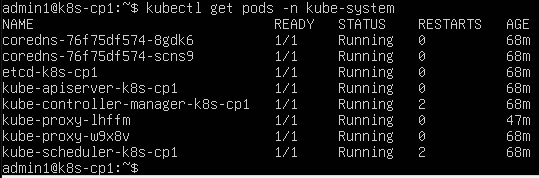
Then I checked kube-system Pods:
kubectl get pods -n kube-system
kubectl get nodes
The control plane should now be Ready.
10) Joining the Worker Node to the Cluster (k8s-w1)
To add the worker node to the cluster, the join command provided by kubeadm init is used. If the join command is lost, it can be regenerated on the control plane:
sudo kubeadm token create --print-join-command
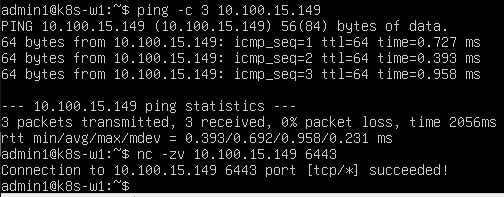
10.1 Network tests before join
From the worker to the control plane, I tested ping and port 6443:
ping -c 3 10.100.15.149
nc -zv 10.100.15.149 6443
10.2 kubeadm join (with sudo)
The join command requires root privileges, so I ran it with sudo:
sudo kubeadm join 10.100.15.149:6443 --token <TOKEN> --discovery-token-ca-cert-hash sha256:<HASH>
When successful, the message “This node has joined the cluster” appears.
10.3 Verification from the control plane
On the control plane, I listed nodes:
kubectl get nodes -o wide
Both nodes should appear as Ready:
- k8s-cp1 Ready control-plane
- k8s-w1 Ready

11) First Application: Nginx Deployment and Scaling
Now that the cluster is ready, I started practicing Kubernetes usage.
11.1 Creating a Deployment
kubectl create deployment web --image=nginx
kubectl get pods -o wide

11.2 Scale (increase replica count)
kubectl scale deployment web --replicas=3
kubectl get pods -o wide
At this point, I should see 3 Nginx Pods. The Kubernetes scheduler usually places these Pods on the worker node (in my environment, all pods ran on k8s-w1).
This step shows Kubernetes’ core power:
- You say: “I want 3 replicas”
- Kubernetes tries to keep that state
- If a Pod dies, it recreates it
- When needed, it distributes across different nodes
12) Exposing to the Outside with a Service: NodePort
Pods are not exposed to the outside world using their own IPs. For traffic to be routed correctly, the concept of a “Service” is required.
12.1 Creating a NodePort Service
kubectl expose deployment web --type=NodePort --port=80
kubectl get svc
In the output, a line like this is expected:
web NodePort … 80:30134/TCP
This shows that port 80 inside the container is mapped to a port like 30134 on the node.

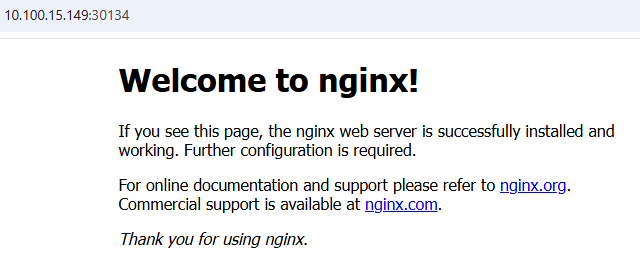
12.2 Access from a browser
Because it is NodePort, these addresses work:
http://10.100.15.149:30134 (control plane node IP + NodePort)
http://10.100.15.148:30134 (worker node IP + NodePort)
In the browser, I see the “Welcome to nginx!” page.
13) Critical Concepts I Learned in This Setup
This lab made the following topics clear for me:
13.1 Control Plane vs Worker separation
- The control plane manages the cluster (API, scheduling decisions, state management)
- The worker node runs Pods
In production, applications usually do not run on control plane nodes (protected with taints). In a learning environment everything could run on a single node, but we built a more realistic model with two nodes.
13.2 containerd and cgroup compatibility
The SystemdCgroup=true setting is critical. If it is wrong, strange errors can appear due to kubelet/containerd incompatibility.
13.3 Without CNI, the cluster is not “complete”
Without CNI, the node stays NotReady. Pods cannot get networking. After installing Flannel, the node became Ready and Pods started working normally.
13.4 A Service makes the application “usable”
A Deployment only creates Pods. To expose to the outside world, a Service is required. NodePort is a simple method; in real life, Ingress/LoadBalancer is mostly used.
13.5 Network issues come before Kubernetes issues
In this project, the part that took the most time was not Kubernetes, it was the network. Because:
- Nodes must be able to ping each other
- API Server port 6443 must be reachable
- DNS and internet access affect package downloads and image pulls
In practice, I learned this:
If something is not working on the Kubernetes side, first check these:
- ip a / ip r
- ping (node ↔ node)
- nc -zv <cp_ip> 6443
- systemctl status containerd kubelet
14) Common Errors and Solutions
Short summaries of typical errors I encountered during this setup:
14.1 kubeadm join “not root” error
Error: user is not running as root
Solution: Run the command with sudo:
sudo kubeadm join ...
14.2 kubeadm join JWS / identity verification error
In some cases, the worker cannot verify the API server identity. The most practical solution:
Generate a new join command on the control plane:
sudo kubeadm token create --print-join-command
Then try joining again on the worker.
14.3 DNS and internet issues
For package download failures or image pull errors, first:
ping -4 -c 2 1.1.1.1
ping -4 -c 2 google.com
If IP works but DNS does not, check netplan nameserver or systemd-resolved settings.
14.4 CNI leftovers / network remaining after reset
If CNI interfaces remain while resetting the cluster, you may need to clean them:
sudo kubeadm reset -f
sudo rm -rf /etc/cni/net.d
sudo ip link delete cni0
sudo ip link delete flannel.1