Sharing notes from my ongoing learning journey — what I build, break and understand along the way.
Windows Server File Sharing & NTFS Permissions Guide | Lab Tutorial
Windows Server File Shares, NTFS Permissions
As a system administrator, one of your most critical tasks is ensuring that data is accessible only to the right people with the correct level of authorization. In this guide, we will walk through creating a folder structure on Windows Server, configuring user permissions, and using the “Effective Access” tool to verify our setup.
1. User Management: Fast and Efficient Methods
There are several ways to create users in Windows. In this project, we used three different methods to create our test users:
- User1: Created via the Graphical User Interface (GUI) using
compmgmt.msc. - User2: Created via PowerShell for speed.
- User3: Created via the Command Prompt (CMD).

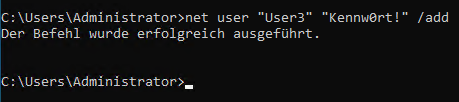
Example of creating User3 instantly using the
net usercommand in CMD.
2. Sharing vs. NTFS Permissions: Why Both Matter?
In Windows, accessing a file requires passing through two “gates”: Share Permissions and NTFS Permissions. If a user has “Full Control” in the Share settings but is “Unauthorized” in the Security (NTFS) tab, they will still be blocked.
Scenario: We shared the “Daten” folder but initially did not define NTFS permissions for User1.
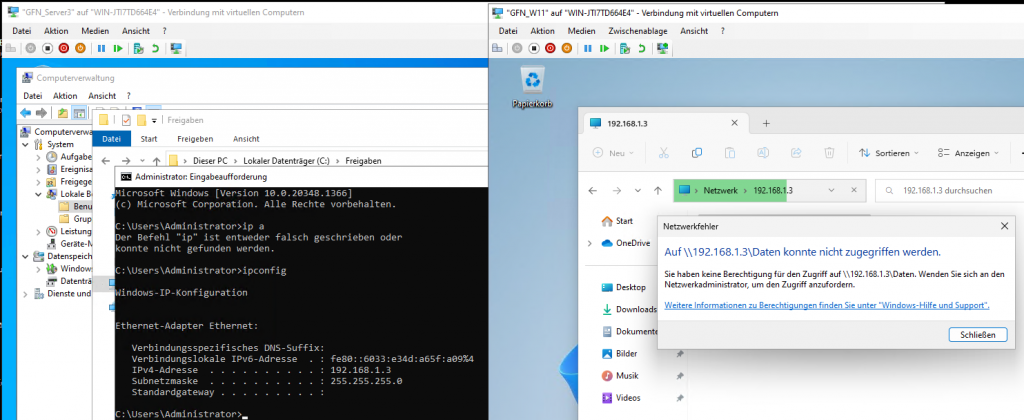
Result: Windows displays an “Access Denied” error because the NTFS permissions are missing, even though the share is active.
To fix this, we navigated to the Security tab and added User1 and User2:
- User1: Assigned Read permissions only.
- User2: Assigned Modify (Change) permissions.
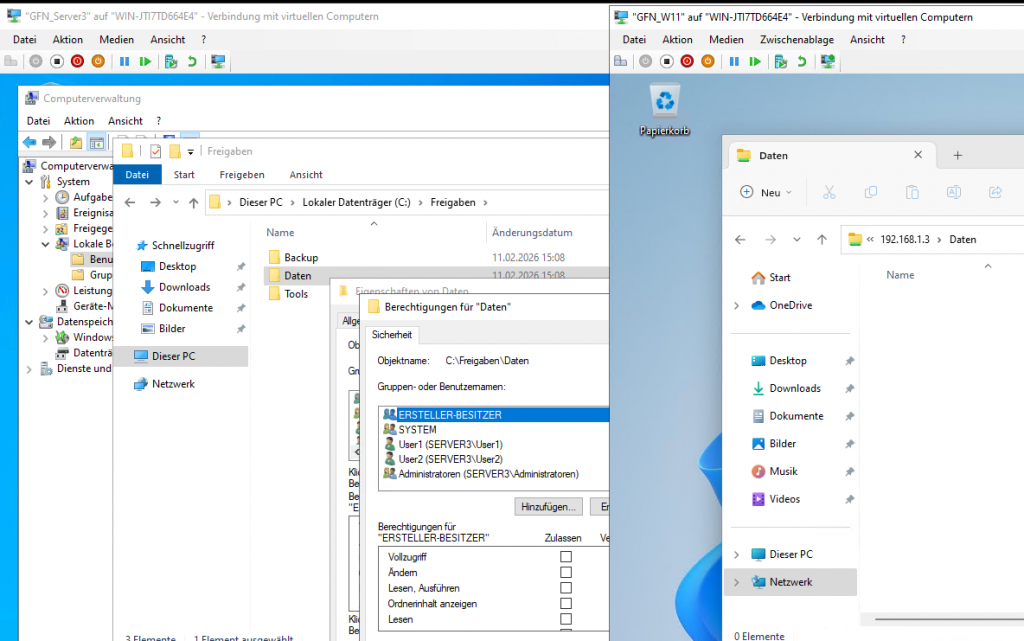
The Security tab showing the users added to the NTFS access control list.
3. Practical Testing: Reading vs. Writing
After configuring the permissions, we switched to the Windows 11 (W11) client machine to test the access.
- Restricted Access: When logged in as User1, we can see the files, but attempting to create a new document results in an error because User1 only has read access.
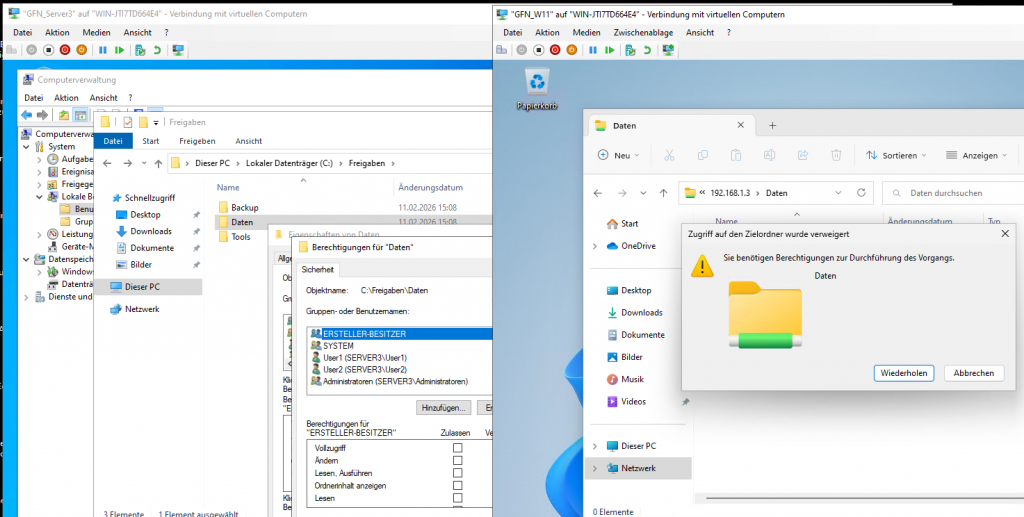
- Full Access: When logged in as User2, we can both view the folder and successfully create new files, such as a “test” document, because User2 has modify rights.

4. Hidden (Administrative) Shares
Sometimes, you want a folder to be active on the network but invisible to casual browsing. By adding a $ sign to the end of the share name (e.g., Tools$), the share becomes hidden. Only users who know the exact path can access it.
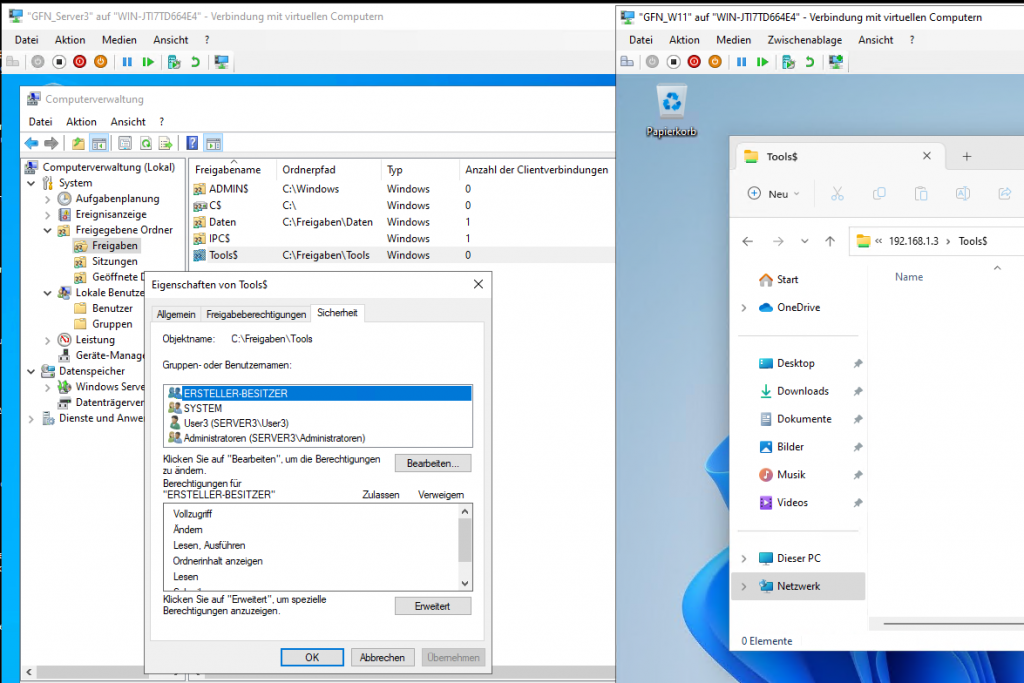
Viewing the hidden
Tools$share being accessed directly via its UNC path.
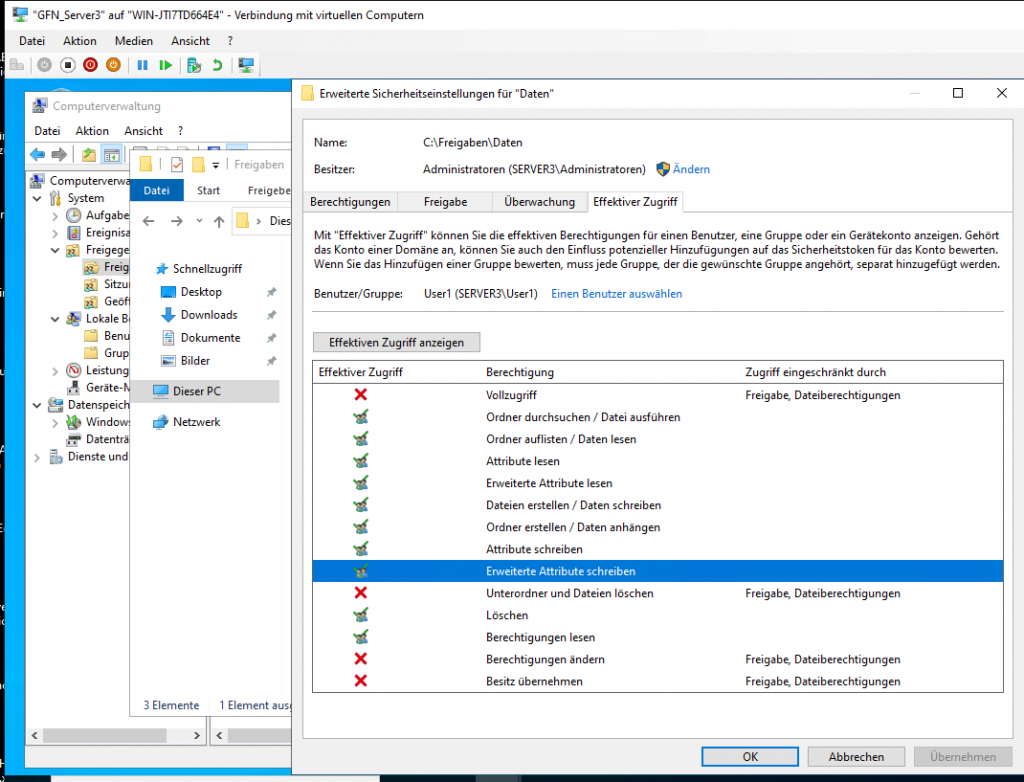
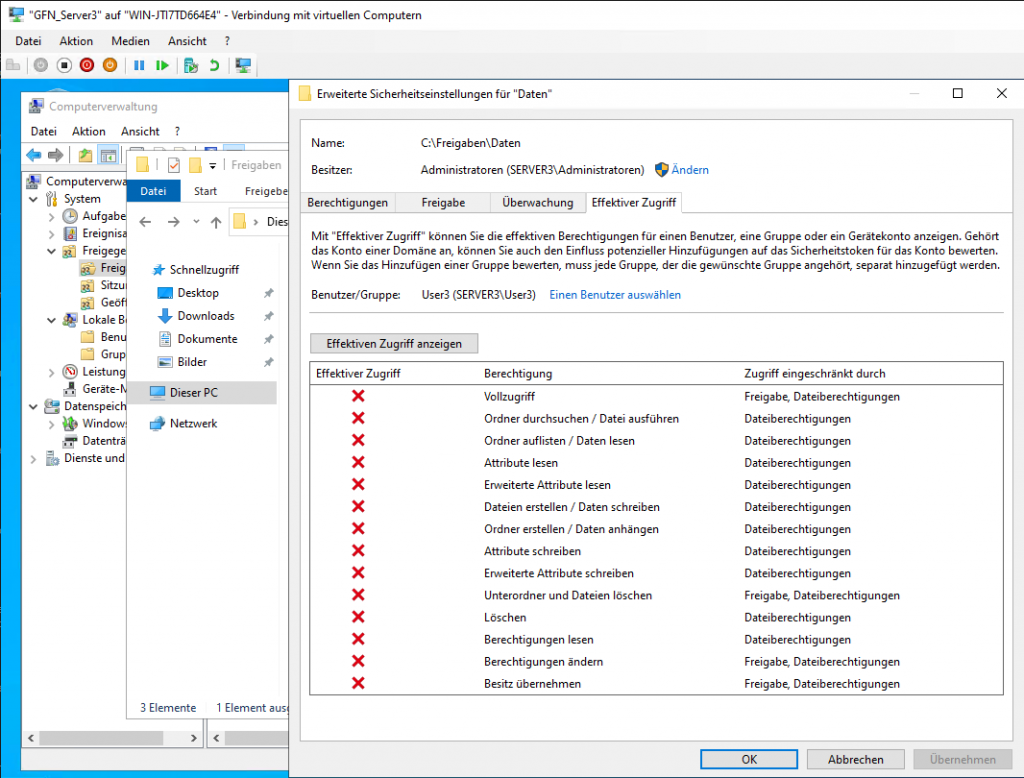
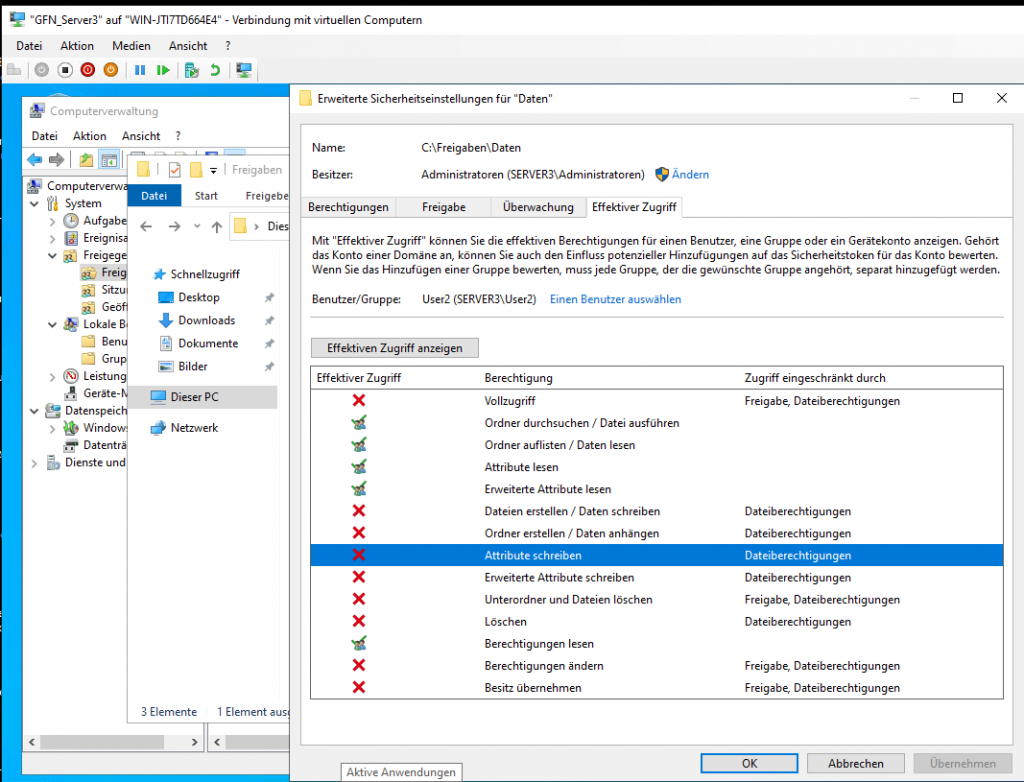
5. Analyzing “Effective Access”
When permissions become complex (due to groups or inheritance), we use the Effective Access (Effektiver Zugriff) tab to see a user’s actual resulting permissions.
- User1 Analysis: The report confirms that only “Read” permissions are green-checked, while “Write” and “Delete” are marked with a red X.
- User3 Analysis: Since no NTFS permissions were granted to User3 for this folder, the report shows red Xs for almost every action.
- User2 Analysis: The analysis confirms that User2 has both read and write/modify permissions enabled.
Hands-on Lab: Windows Server File Services & Security
If you want to practice professional file server management, you can set up a lab environment with one Windows Server (Server3) and one Windows Client (W11). Follow the path below to replicate the exercises.
1. Environment Preparation
Before starting, ensure your virtual machines are running and connected to the same network.
- Server3: The File Server where data is hosted.
- W11: The Client machine used to verify access.
2. Directory and User Setup
On Server3, we begin by creating the structure and the users.
Create Folders:
- Navigate to
C:\and create a folder named Freigaben. - Inside
C:\Freigaben\, create three folders: Daten, Tools, and Backup. - You can use the GUI, CMD (
mkdir), or PowerShell (New-Item) to create these.
Create Users:
- User1: Use “Computer Management” (
compmgmt.msc) to create this user with the Password. - User2: Use PowerShell with the command:
New-LocalUser -Name User2 -Password Testpassword. - User3: Use CMD with the command:
net user "User3" "PASSWORD" /add.
3. Configuring Standard and Hidden Shares
Now, let’s make these folders accessible over the network.
The “Daten” Folder (Standard Share):
- Right-click Daten > Properties > Sharing > Advanced Sharing.
- Check Share this folder and set the name to Daten.
- Under Permissions, grant the group Everyone (Jeder) the “Change” (Ändern) permission.
The “Tools” Folder (Hidden Administrative Share):
- Use Computer Management > Shared Folders > Shares.
- Right-click and select New Share.
- Browse to
C:\Freigaben\Tools. - Key Step: Set the Share name to Tools$. The
$makes the share invisible to users browsing the network. - Assign User3 the “Change” permission.
4. Hardening Security with NTFS Permissions
Share permissions are not enough; we must configure the Security (NTFS) tab for granular control.
- For both folders, go to the Security tab and click Advanced.
- Click Disable Inheritance (Vererbung deaktivieren) and choose to convert inherited permissions into explicit ones.
- Remove the default “Users” group to ensure only authorized users have access.
- User1: Add with Read (Lesen) permissions only.
- User2: Add with Modify (Ändern) permissions.
- User3: Add to the Tools folder with Modify permissions.
5. Testing and Validation
Switch to the W11 client to verify the results.
- Verification 1 (User1): Access
\\Server3\Daten. You can view files but cannot create or delete them. - Verification 2 (User2): Log in and access the same path. You can successfully create and edit documents.
- Verification 3 (User3 & Hidden Share): If you browse
\\Server3, you won’t see “Tools”. You must type the full path\\Server3\Tools$to access it.
Summary
When configuring permissions, always follow the “Principle of Least Privilege”. Only give users the minimum level of access they need to perform their jobs to keep your system secure.