Sharing notes from my ongoing learning journey — what I build, break and understand along the way.
Active Directory Step-by-Step: FSMO Transfer & RODC Setup
Deep Dive into Active Directory: Mastering FSMO Roles and Securing Branch Offices (RODC)
Active Directory (AD) is essentially the “digital phonebook” and security guard of a company network. It manages users, computers, and permissions. However, as an organization grows, simply creating users isn’t enough. We need to manage how the system makes decisions and how to secure servers in unsafe locations.
In this lab walkthrough, we explore two advanced concepts:
- FSMO Roles: The “Brain Trust” of Active Directory.
- RODC (Read-Only Domain Controller): Securely placing servers in branch offices.
Note: This lab was performed in a German language environment. As IT professionals, navigating the OS by technical intuition—regardless of the interface language—is a valuable skill!
Part 1: Who is in Charge? (FSMO Roles)
In a network with multiple Domain Controllers (DCs), changes usually replicate to all of them. However, some tasks are so critical that only one server is allowed to handle them to prevent conflicts. These are called FSMO (Flexible Single Master Operation) Roles.
Analogy: Imagine if two different HR managers tried to change the company’s official name at the exact same time. It would be chaos. FSMO roles ensure that for specific high-level tasks, there is only one “Manager” who can say yes or no.
Step 1: Checking the Current Status
Before making changes, we need to know who holds these roles. We use the command netdom query fsmo.
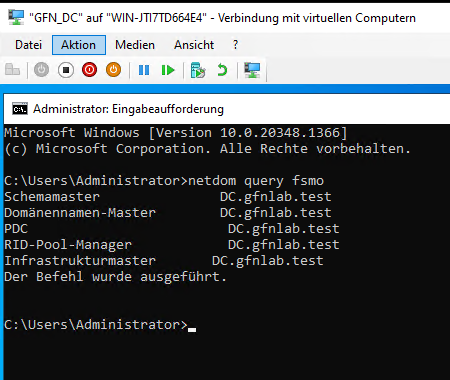
We see that all 5 roles are currently held by the main DC.
Step 2: Transferring the Schema Master Role
The Schema Master defines the structure of the database (e.g., “a user must have a First Name”). It is so sensitive that Microsoft hides the management console by default. We want to move this role to Server2.
- Registering the DLL: First, we must enable the console using
regsvr32.exe schmmgmt.dll.
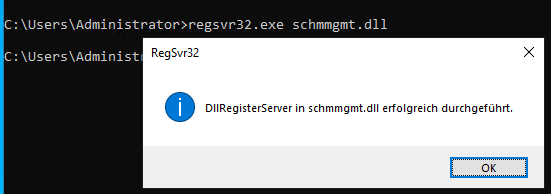
Successfully registering the DLL to unlock the tool.
- Opening the Console: We open MMC (Microsoft Management Console) and add the “Active Directory Schema” snap-in.
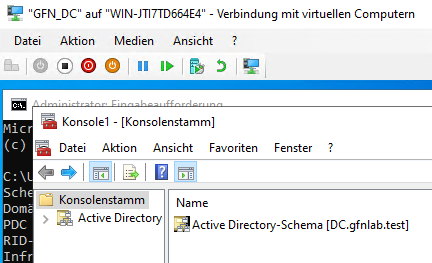
- Connecting to the Target: To pull the role, it is best practice to connect our console to the destination server (
Server2).
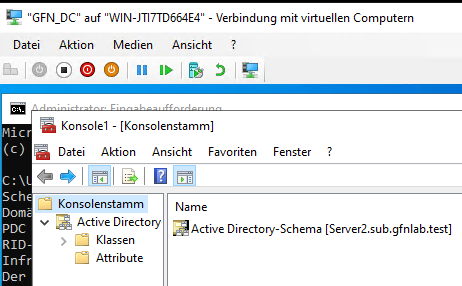
Pointing our console to Server2.
- The Transfer: We initiate the transfer. The system confirms that
Server2is now the master of the Schema.
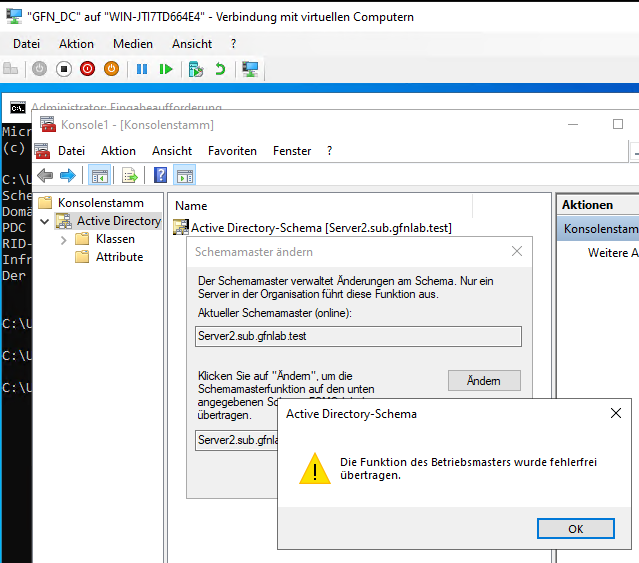
Success! The role has been moved.
Step 3: Moving the Domain Naming Master
This role prevents duplicate domain names in the forest. We moved this role to Server3 using PowerShell, which is often faster than clicking through menus.
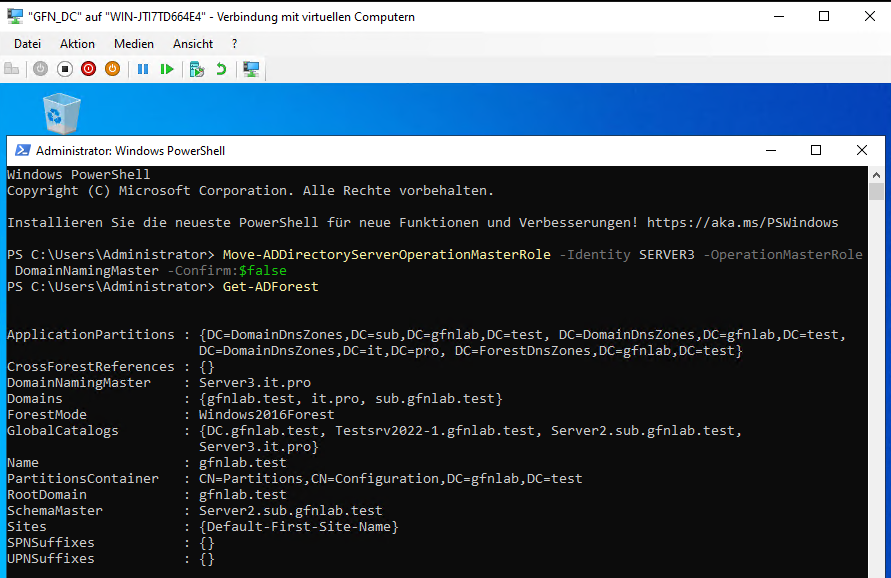
Using PowerShell to move the role and verifying it with Get-ADForest.
Part 2: Securing the Branch Office (RODC)
Imagine you have a small branch office with no secure server room—the server sits under a desk. If someone steals that server, they could crack the passwords and hack the entire company.
The Solution: Read-Only Domain Controller (RODC).
- It holds a copy of the database but cannot be changed directly.
- It does not store passwords by default (so stealing it yields nothing).
Step 1: Demoting the Old Server
We want to convert Server1 (which was a full DC) into an RODC. You cannot just “switch” modes. You must first strip it of its power (Demote). If you try to remove the role without demoting, Windows stops you to protect the database.
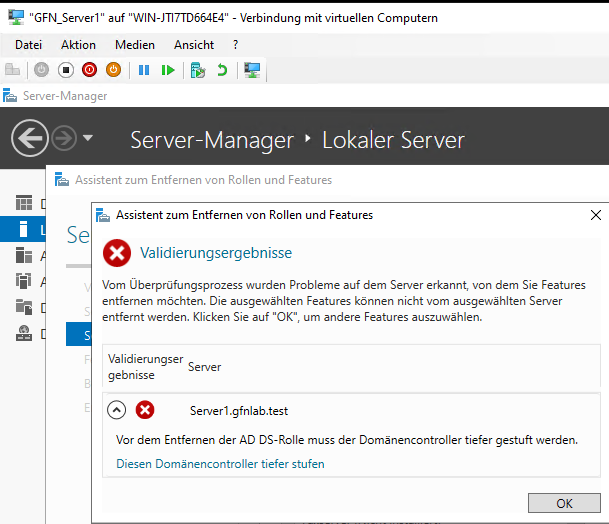
The safety mechanism preventing us from deleting the role before demotion.
After properly demoting Server1, we also clean up its old metadata from “Active Directory Sites and Services” to ensure a clean slate.
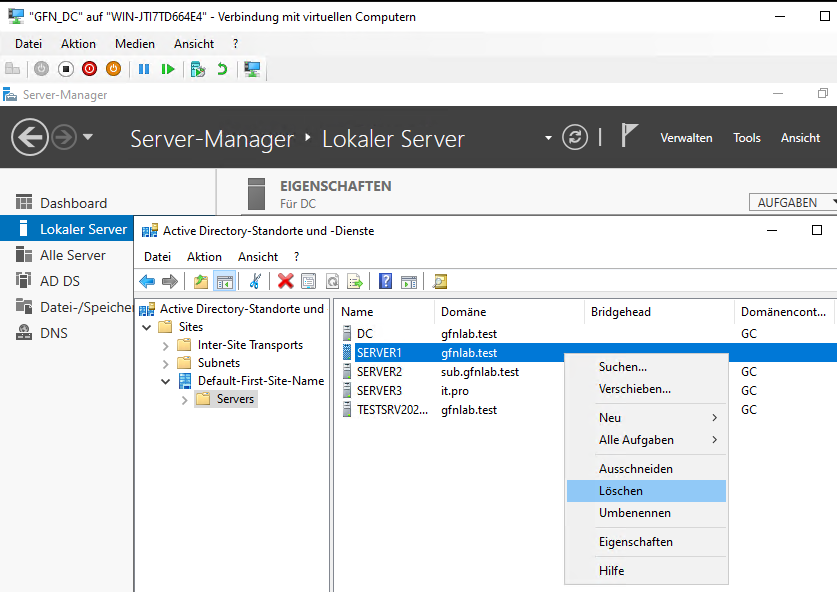
Deleting the old Server1 object manually.
Step 2: Pre-Staging the RODC
We can set up the RODC account in advance from the headquarters. This allows us to assign a specific user (e.g., rodc-admin) who can perform the installation at the branch office without giving them full Domain Admin rights.
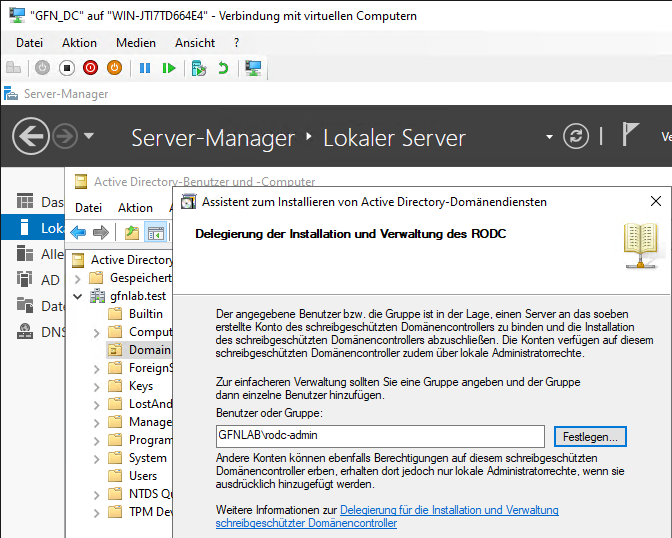
Delegating installation rights to the ‘rodc-admin’ user.
Step 3: Installation at the Branch
When the technician at the branch (Server1) starts the installation, the system recognizes that we already prepared an account for this computer.
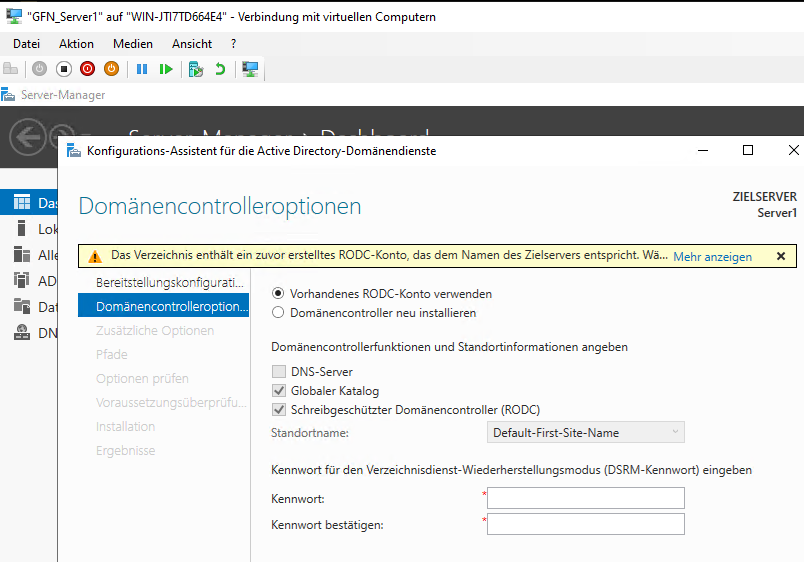
The wizard detects our pre-staged account and lets us “Use existing RODC account”.
Part 3: Verifying Security & Password Policies
Now that Server1 is an RODC, we need to prove it is secure.
Test 1: Is it really Read-Only?
We logged in as the administrator and tried to create a new user. The options were grayed out or missing because this server is Read-Only.
The “New User” option is missing.
DNS records cannot be changed either.
Test 2: Password Replication Policy (PRP)
This is the most critical security feature. If the internet link to headquarters breaks, branch users need to log in. However, we don’t want everyone’s password stored on this insecure server.
We configured a policy:
- Allow:
Aaron Sirup(A branch employee). His password is cached so he can work offline. - Deny:
Donna Wetter(An Admin). Her password is never stored here. If the server is stolen, her account is safe.
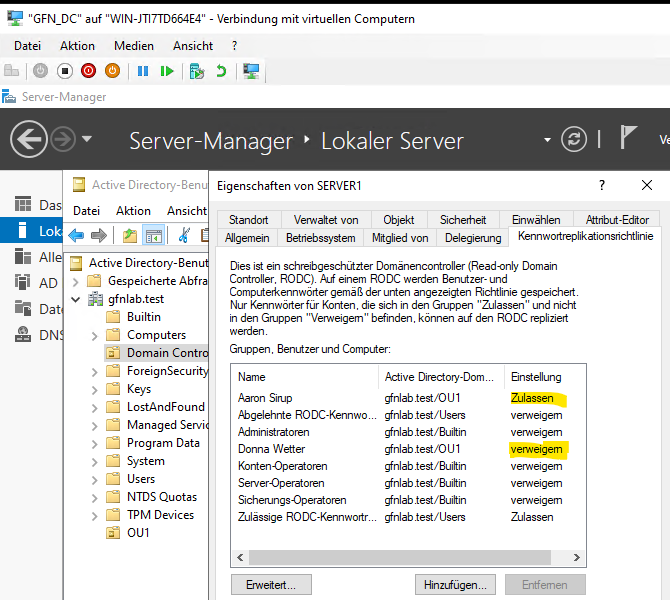
Configuring the Allow (Zulassen) and Deny (Verweigern) lists.
Final Proof
We checked the “Resultant Policy” to see if the rules were working.
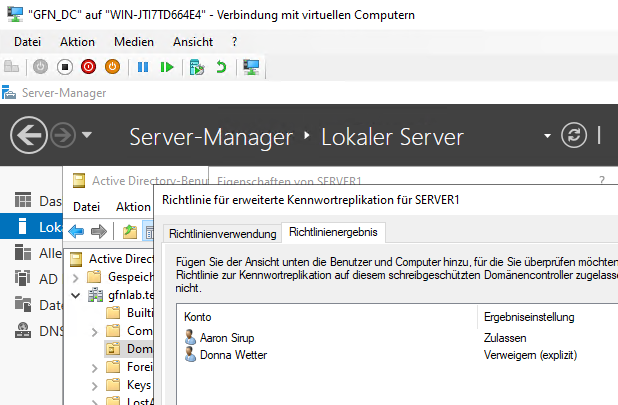
The math works! Aaron is Allowed, and Donna is Explicitly Denied.
Conclusion
By completing this lab, we went beyond basic user management. We learned how to:
- Move the “Brain” of the network (FSMO) to different servers.
- Deploy a secure server (RODC) in an insecure location.
- Use Password Policies (PRP) to balance usability and security.