Sharing notes from my ongoing learning journey — what I build, break and understand along the way.
Build a Secure Enterprise Network: Proxmox, DNS, & DHCP Guide
Building a Company’s Digital Heart: A Guide to Enterprise Server Infrastructure from Scratch
In today’s digitized world, a company’s success isn’t just measured by the product it sells, but by the robustness of the technological infrastructure supporting it. As a systems engineer in training, I undertook a massive project in a “Remote Lab” environment to build an infrastructure capable of meeting the entire networking needs of a mid-sized company. This post isn’t just a list of commands; it is the story of how a network is brought to life.
1. The Architectural Decision: Why Virtualization?
It all started with a question: Do we need five different physical machines for five different server services? Of course not. That would be a waste of both cost and energy. The solution: Proxmox Virtual Environment 9.0.3.
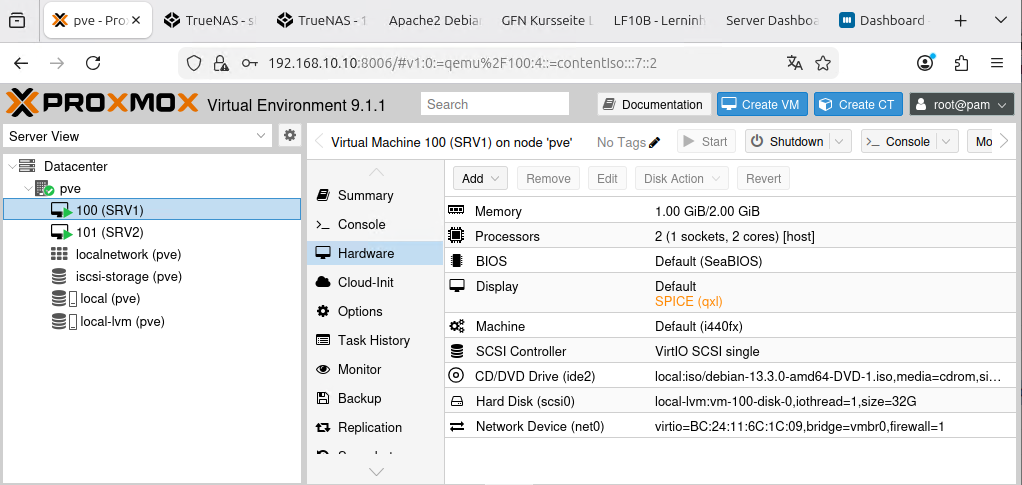
Think of Proxmox as an apartment manager. It takes a single powerful piece of hardware and divides it into isolated, secure apartments (Virtual Machines – VMs). We reserved our first “apartment” for the SRV1 server, which provides the core base services for the company.
When setting up our server, we were frugal but smart with hardware. We started with a 2-core CPU and 2048 MB of RAM. The critical move here was setting the CPU type to “host”. This allows the virtual machine to use the full capabilities of the physical processor as if it were directly connected.
2. The Gatekeeper: Debian-Based Router
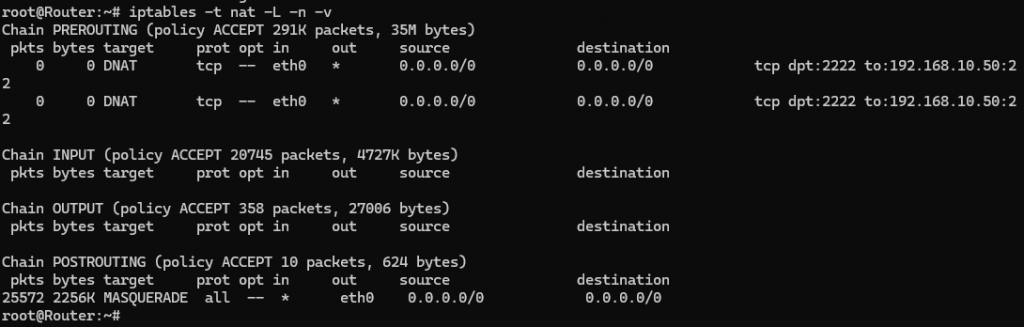
When you build a network, your biggest nightmare is external attacks. That’s why we placed a “Debian Router” at the very front. This router allows computers inside the company to access the internet while blocking uninvited guests from the outside.
However, there was a catch: the Linux kernel does not forward packets by default. We had to tell it to “pass the incoming packet to the other gate”.

Our internal machines needed to use a single identity when going out to the internet. To achieve this, we wrote a masking (Masquerade) rule using iptables. This is like hundreds of people wearing the same mask to go outside while everyone knows their own name inside.
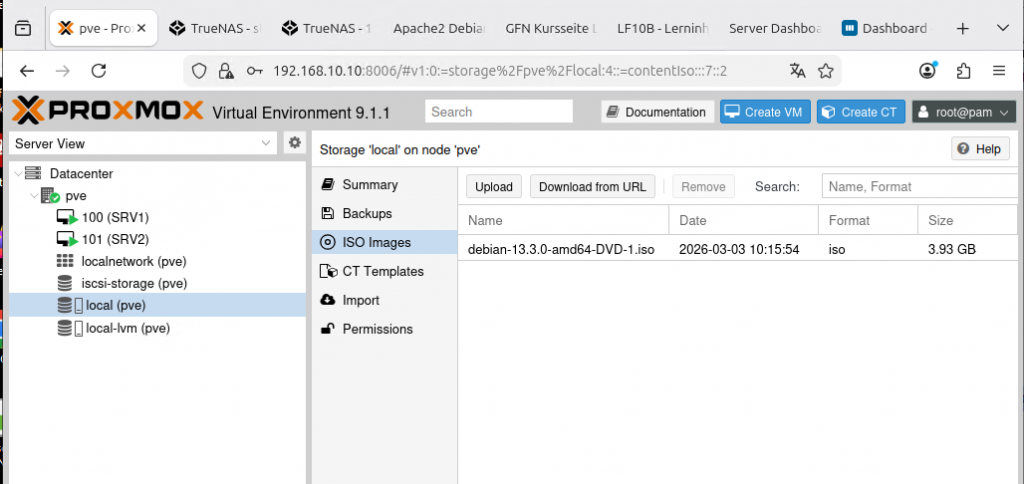
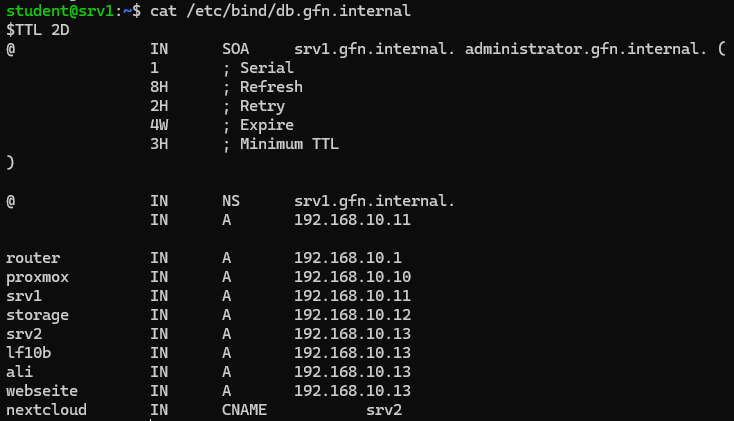
3. Preparing the Directory: BIND9 DNS Server
In the world of networking, no one wants to type 192.168.10.11 to get somewhere. We humans love names. That’s why we set up the network’s “phone book,” the DNS server, using BIND9. Now, to reach our server, we simply type srv1.gfn.internal.
When creating our private directory (Zone files), we defined exactly which name goes to which address. If a name not in our directory arrives (like https://www.google.com/search?q=google.com), our server is configured to ask the world’s major DNS directories like 1.1.1.1.
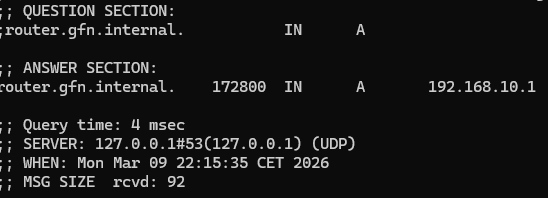
Is the directory actually working? The way to find out is by using the dig command. When we ask the server, “Where is the router?”, it should give us an immediate answer.
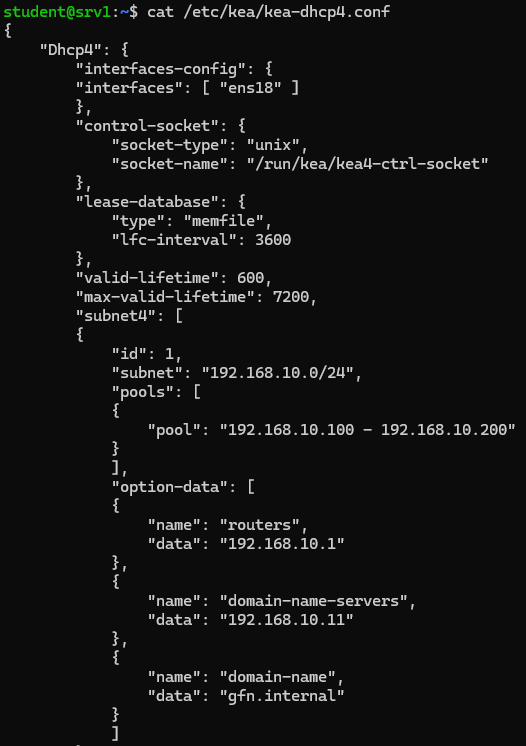
4. Ending IP Chaos: Kea DHCP
When a new computer joins your network, who gives it an ID card (IP address)? We used to do this manually, but in a company with hundreds of computers, that is a disaster. We used the Kea DHCP service to automate this.
Our DHCP server whispers the following to every device connecting to the network:
- “This is your IP address (between 192.168.10.100 and .200).”
- “If you want to go to the internet, use this gate (Router: 192.168.10.1).”
- “If you wonder about someone’s name, ask this directory (SRV1: 192.168.10.11).”
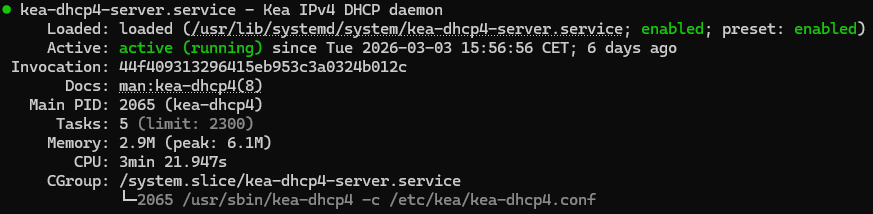
Seeing that green light (Active: running) is the best reward, proving the system is working perfectly.
5. Fortifying the Castle: SSH Hardening
Servers are under attack as long as they are connected to the internet. Using standard gates (Port 22) is an invitation to thieves. So, we moved the gate to a secret location: Port 6464. Now, bots and scanners cannot find us at the standard spot.

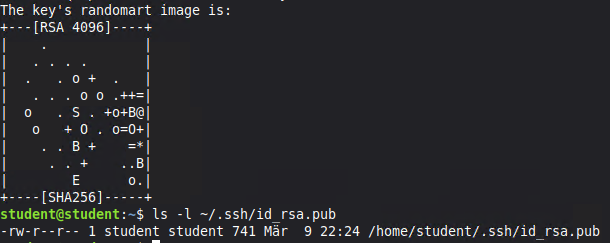
But hiding the gate isn’t enough; we must make the key impossible to copy. Against the risk of stolen passwords, we switched to SSH Public Key Authentication. This means that entering the server requires a unique digital key (Private Key) rather than a password.
6. The Grand Finale: Client Testing
This massive structure means nothing if it doesn’t serve the end user. We connected our Linux Mint client (CL01) to the “Firmennetz” switch. Without needing any manual configuration, our client received its IP via DHCP, recognized our DNS server, and accessed the internet through the router.

Conclusion: What Have We Gained?
This lab work demonstrated that when you combine the right tools (BIND9, Kea, Proxmox, Debian) with the right strategy, you can build an enterprise-level network infrastructure entirely with free and open-source software.
Now our company has:
- An isolated and secure network.
- A memory that resolves names (DNS).
- A system that automatically identifies newcomers (DHCP).
- An access path armored against hackers (SSH).
In the next step, we will continue to scale our digital building by adding web servers and databases to this infrastructure. Stay tuned!