Sharing notes from my ongoing learning journey — what I build, break and understand along the way.
Basic User Settings with Group Policy: Wallpaper and Run Menu Restriction
My First User-Based Group Policy Configuration in an Active Directory Environment
In this post, I want to share my first basic Group Policy configuration in my lab environment. Instead of going into advanced settings, my goal was to apply a few simple but visible policies to a user OU.
For this first part, I avoided very restrictive settings on purpose. In a lab environment, it is important not to lock yourself out while testing. For example, disabling Command Prompt or the Settings app too early can make troubleshooting harder later. That is why I decided to start with two safer settings:
- Changing the desktop wallpaper with Group Policy
- Removing the Run command from the Start Menu
These two settings are enough to demonstrate the basic logic of Group Policy, and the results can easily be tested on a Windows 11 client.
Existing OU Structure
First, I checked the OU structure in Active Directory. In this environment, I am using a department-based structure. Each department has separate OUs for users, computers, and groups.
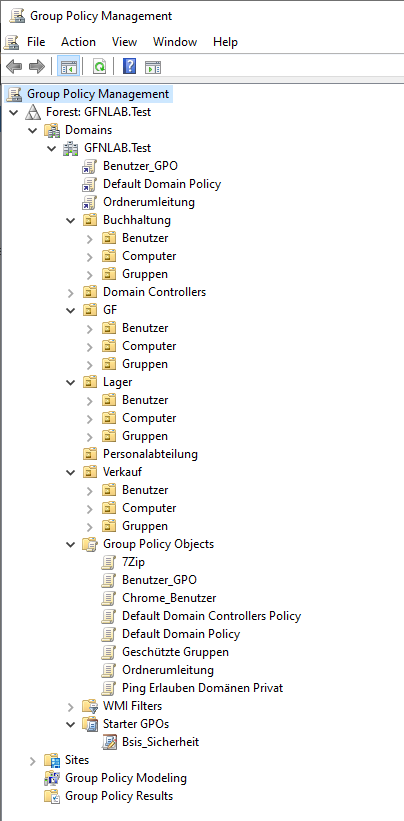
I use this structure because it keeps Group Policy management more organized. User settings can be applied to user OUs, and computer settings can be applied to computer OUs. This makes policy management much more controlled.
Since this post is focused on user-based policies, the most important part for me is the OU where the user account is located.
Test User
For this configuration, I used Frieda Fleissig as my test user. This user is located inside the Benutzer OU under the Buchhaltung department.
GFNLAB.Test
→ Buchhaltung
→ Benutzer
→ Frieda Fleissig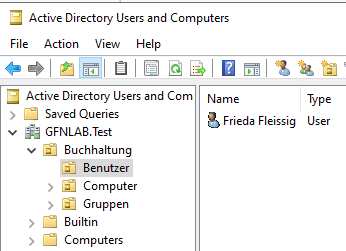
This step is important because I will link the GPO directly to this OU. As a result, the settings will only apply to users inside this OU.
Creating a User-Based GPO
Next, I created and linked a new GPO to the Buchhaltung → Benutzer OU using the Group Policy Management Console.
I named the GPO:
Buchhaltung_User_Restrictions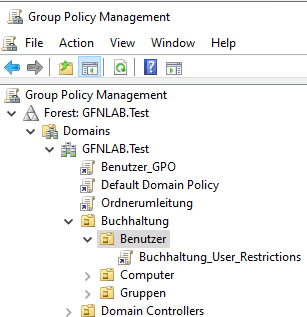
The important point here is that I linked the GPO to the OU where the user account exists. If I had linked this GPO to the wrong OU, the policy would not have applied to the expected user.
Placing the Wallpaper File in a Shared Folder
As the first setting, I wanted to change the desktop wallpaper with Group Policy. Before configuring the policy, I placed the wallpaper file in a shared location that client machines can access.
On the DC, I shared the C:\Software folder and placed the wallpaper file inside it.
The file path I used was:
\\DC\Software\wp13577491.jpg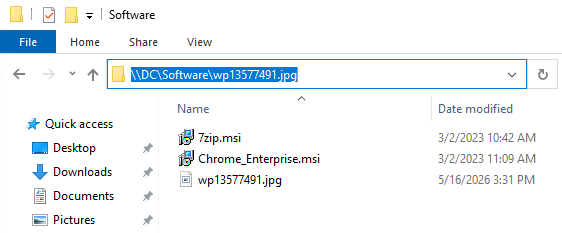
There is an important detail here. A local path should not be used inside the Group Policy setting.
Wrong example:
C:\Software\wp13577491.jpgCorrect example:
\\DC\Software\wp13577491.jpgThe Windows 11 client cannot access the DC’s local C:\Software path directly. That is why a shared path, also called a UNC path, must be used.
Before configuring the GPO, I verified from the Windows 11 client that this file was accessible. When I opened the following path in File Explorer, the image was displayed successfully:
\\DC\Software\wp13577491.jpgAfter confirming that, I continued with the wallpaper policy configuration.
Configuring the Desktop Wallpaper Policy
I edited the GPO that I created earlier and went to the following path:
User Configuration
→ Policies
→ Administrative Templates
→ Desktop
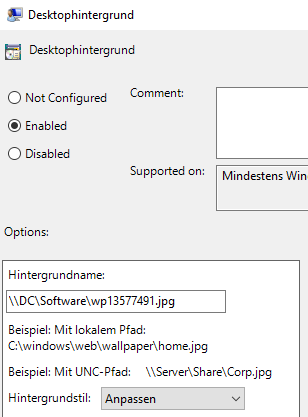
→ DesktopHere, I opened the Desktop Wallpaper setting and set it to Enabled.
For the wallpaper path, I entered the following UNC path:
\\DC\Software\wp13577491.jpgFor the wallpaper style, I selected Fill.
With this setting, I expected the desktop wallpaper to be applied automatically when the user signs in.
Testing the Wallpaper on Windows 11
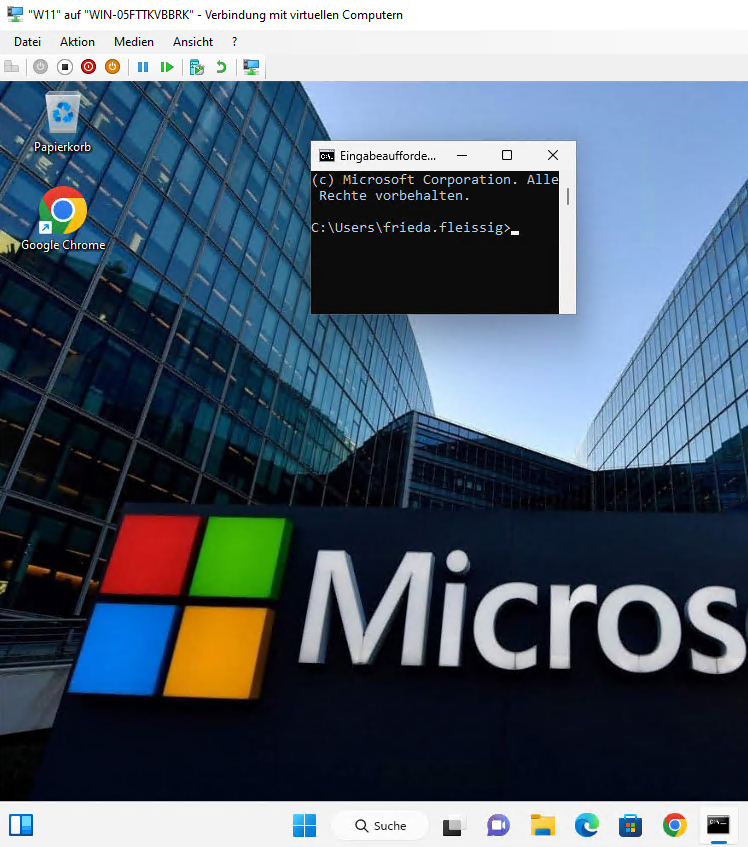
After configuring the policy, I signed in to the Windows 11 client with the test user Frieda Fleissig.
To apply the policy immediately, I ran the following command in Command Prompt:
gpupdate /forceAfter the command completed, I signed out and signed back in. When I logged in again, I saw that the desktop wallpaper had changed.
With this result, I confirmed that the GPO was applied successfully. The user was in the correct OU, the GPO was linked to the correct OU, and the Windows 11 client received the policy.
Removing the Run Menu
As the second setting, I removed the Run command from the Start Menu. This is not a very aggressive restriction, but it is a good example to show how a user policy can change the client experience.
In the same GPO, I went to the following path:
User Configuration
→ Policies
→ Administrative Templates
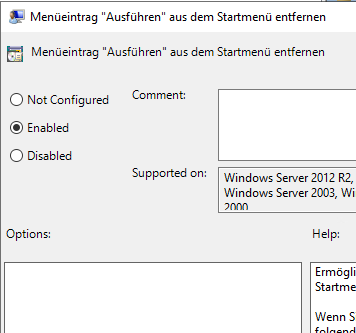
→ Start Menu and TaskbarHere, I found the following setting:
Remove Run menu from Start MenuI set this policy to Enabled.
After this setting is applied, the user cannot access the Run command from the Start Menu. The Windows + R shortcut is also blocked.
Testing the Run Menu Restriction on Windows 11
After configuring the setting, I updated the policy again on the Windows 11 client:
gpupdate /forceThen I signed out and signed back in.
To test it, I pressed the following keyboard shortcut:
Windows Key + RSince the policy was applied successfully, the Run window did not open. Instead, Windows displayed a message saying that this operation was blocked by the administrator.
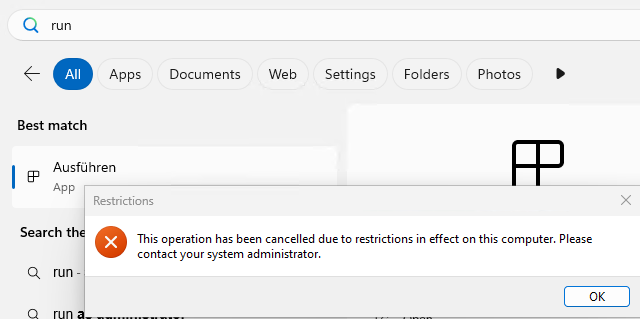
With this test, I confirmed that the second policy setting was also applied successfully to the user.
Checking the Applied GPO with gpresult
Seeing the result visually is useful, but I also wanted to verify from the command line which GPO was actually applied.
On the Windows 11 client, while signed in as the test user, I ran:
gpresult /rIn the output, I checked the USER SETTINGS section. Under Applied Group Policy Objects, I could see the GPO I created:
Buchhaltung_User_Restrictions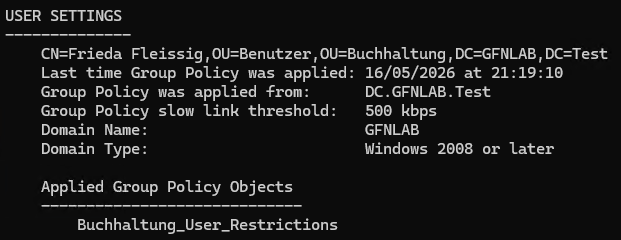
This command is very useful when you quickly want to check whether a policy has actually been applied to a user.
Creating an HTML Group Policy Report
Finally, I created an HTML Group Policy report to get a more readable result.
First, I created the C:\Temp folder:
mkdir C:\TempThen I ran the following command:
gpresult /h C:\Temp\gpresult.htmlAfter that, I opened the generated report in the browser:
C:\Temp\gpresult.html
The HTML report is especially useful during troubleshooting. It makes it easier to see which GPOs were applied, which ones were filtered out, and the details of the configured policies.
Quick Note: Be Careful with Restrictive Policies in a Lab
One thing I want to note from this configuration is that applying very restrictive policies too early in a lab can make testing harder.
For example:
- Disabling Settings and Control Panel
- Blocking Command Prompt
- Blocking PowerShell
- Disabling Registry Editor
These policies can be useful in real environments, but during lab testing, it is more important to make sure the policy is applied correctly and that troubleshooting remains possible. That is why I started with safer settings in this first part.
Conclusion
In this part, I tested the basic logic of user-based Group Policy settings in my lab environment. First, I checked where the user account was located, then I linked a GPO to that OU and configured two different user settings.
In this configuration, I did the following:
- Checked the OU structure.
- Verified that the test user was in the correct OU.
- Created the Buchhaltung_User_Restrictions GPO.
- Placed the wallpaper file in a shared folder.
- Configured the Desktop Wallpaper policy.
- Removed access to the Run menu.
- Tested both settings on a Windows 11 client.
- Verified the applied GPO with gpresult /r and an HTML report.
The most important point from this configuration was:
For user policy settings to apply, the GPO must be linked to the OU where the user account is located.In the next part, I will continue with department-based file access and network drive mapping. The goal will be to automatically assign different network drives to users from different departments using Group Policy.