Sharing notes from my ongoing learning journey — what I build, break and understand along the way.
Step-by-Step Wazuh Installation on Hetzner Server and WordPress Agent Setup
How to Install Wazuh on a Hetzner Server and Connect a WordPress Agent
Today I’ll walk you through, step by step, how I installed Wazuh on a server rented from Hetzner and how I added a Wazuh Agent to another WordPress server.
This was my first time doing it as well, so I wrote the guide so beginners can follow along easily.
1. Getting a Hetzner Server and First Connection
- Log in to your Hetzner Cloud account.
- When creating a new server:
- Location: Choose a data center close to you.
- OS: Ubuntu 22.04 LTS (other versions work too, but I use 22.04 here).
- Adding an SSH key is recommended for security, but password login also works.
- After the server is created, you’ll get an IP address.
- Connect via Terminal or PuTTY:
ssh root@SERVER_IP
Replace
SERVER_IPwith your server’s IP address.
2. Installing Wazuh Server
Update your system:
apt update && apt upgrade -y
Install required packages:
apt install curl apt-transport-https unzip -y
Download the official Wazuh installation script:
curl -sO https://packages.wazuh.com/4.7/wazuh-install.sh
Run the installer:
bash wazuh-install.sh --install
This takes a while. The script installs Wazuh Manager, Wazuh Indexer, and Wazuh Dashboard.
Once it completes, the installer prints the Dashboard URL and login info.
Open it in your browser (replace with your IP):
https://SERVER_IP

3. First Login to the Wazuh Dashboard
- Your browser may warn about HTTPS; continue to the site.
- Log in using the credentials shown at the end of the installer.
- In the left menu you’ll see the Agents section.
4. Installing Wazuh Agent on the WordPress Server
Connect to the server that hosts your WordPress site (via SSH), then:
Update the system:
apt update && apt upgrade -y
Add the Wazuh Agent repo and install:
curl -s https://packages.wazuh.com/key/GPG-KEY-WAZUH | gpg --dearmor > /usr/share/keyrings/wazuh.gpg
echo "deb [signed-by=/usr/share/keyrings/wazuh.gpg] https://packages.wazuh.com/4.x/apt/ stable main" > /etc/apt/sources.list.d/wazuh.list
apt update
apt install wazuh-agent -y
Edit the Agent configuration:
nano /var/ossec/etc/ossec.conf
Inside the <address> tag, put your Wazuh Server IP:
<client>
  <server>
    <address>WAZUH_SERVER_IP</address>
  </server>
</client>
Enable and start the Agent:
systemctl enable wazuh-agent
systemctl start wazuh-agent
5. Adding the Agent in the Wazuh Dashboard
- In the Dashboard, go to Agents → Add agent.
- Choose Linux as the operating system.
- Enter your server’s name and click Save.
- Copy the generated key and run this on the WordPress server:
/var/ossec/bin/agent-auth -m WAZUH_SERVER_IP -A WORDPRESS-SERVER-NAME
Restart the Agent:
systemctl restart wazuh-agent
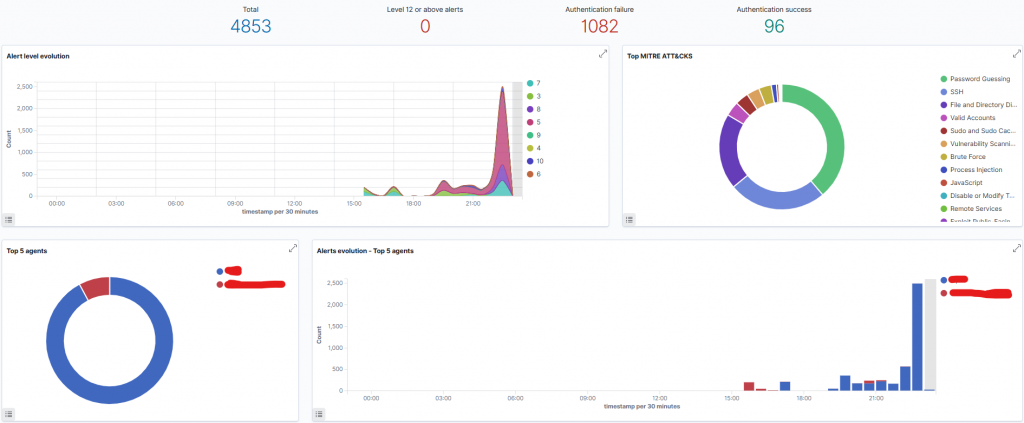
6. Verifying the Installation
- Go back to the Agents page in the Dashboard.
- Within a few minutes, the WordPress server should show Active.
- You can now monitor logs and security alerts through Wazuh.
Installing Wazuh for the first time can look intimidating, but step by step it’s pretty straightforward.
In this post, I installed Wazuh Server on a Hetzner machine and then connected a WordPress server as an Agent.
Next, I plan to harden security further with rules and tools like ModSecurity and Fail2ban.